Showing posts with label grill. Show all posts

Saturday, September 10, 2016

Baptist Chicken

It took me a while to admit to myself that my favorite meat is chicken. Well, grouse is better than chicken, but they're pretty close to the same thing. My favorite way to cook chicken is what we have termed "Baptist Chicken". That is, chicken that's first grilled then immersed in sweet sauce. The key is to coat it by immersion only after it's fully cooked.

It's real barbecue: we cook it in smoke at around 200° F. But chicken cooks pretty quickly: a whole chicken is completely cooked somewhere between four and six hours. When we're doing Baptist Chicken, we generally use legs and thighs.

With the Big Joe, Baptist Chicken has become the perfect slow-cooker meal. The Big Joe maintains its temperature beautifully – it once went 35 hours for me at a constant 215°F – nothing could be easier than throwing some chicken onto the Joe and ignoring it for four hours or so.

Let's address the first issue: rubbery chicken skin. Conventional wisdom says you'll get rubbery chicken skin if you cook chicken that low. That's only kinda-sorta true. The key is to cook the chicken directly over the fire, rather than using "indirect heat". On the Big Joe, that means I generally don't use the ceramic heat deflectors for chicken.

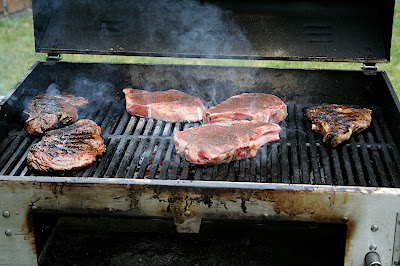
The mistake to avoid with barbecued chicken is saucing it too early. You don't want to even think about getting any sort of sugar- or tomato-based sauce on that chicken until it's at least safe to eat, if not fully cooked. If you sauce it too early, you'll get burned sauce on your chicken.

Once the chicken is entirely cooked, you want thin coats of sweet sauce on it. If you just want to use barbecue sauce from a jar (there's nothing wrong with that), then you'll want to thin it. I prefer to thin it with an eastern North Carolina style of sauce, but you can thin it with vinegar or a combination of vinegar and water. The key is to get it thin enough it'll coat the meat evenly.

So here's how I do it:

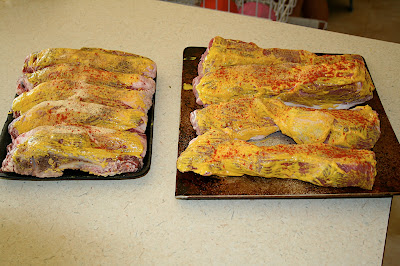
  1. I coat a bunch of chicken legs and/or thighs liberally with salt, black pepper, and garlic powder. I use garlic powder instead of fresh garlic for almost every grilling application. Not for souvlaki...
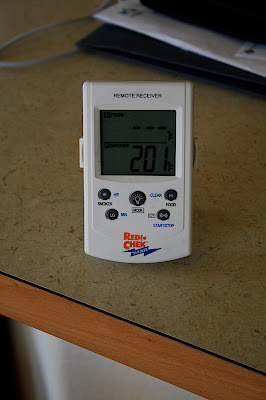
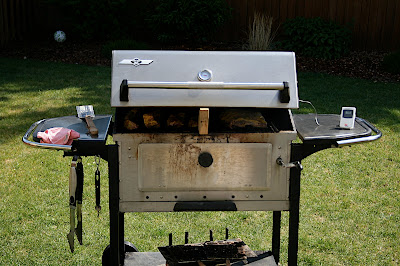
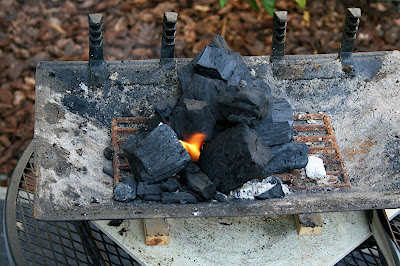
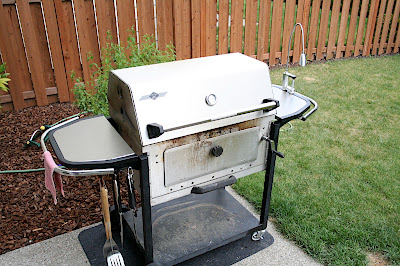
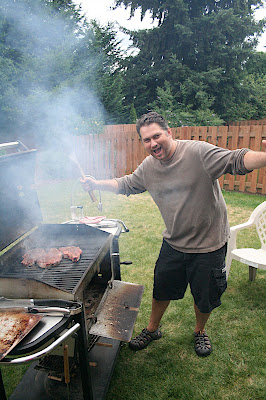
  2. I set up the grill. With my grill, I know that a one-inch opening on the bottom vent plus the daisy wheel set about half-open on the top gives me almost exactly 200°F, depending on the weather.
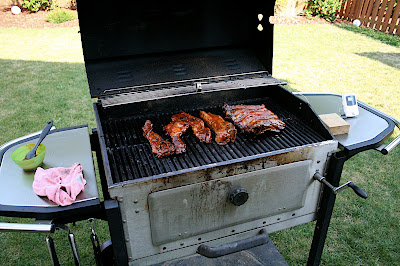
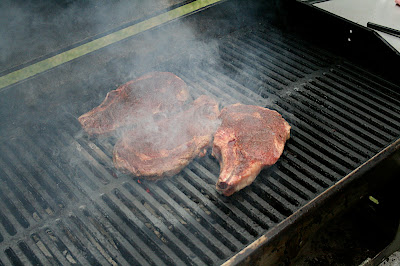
  3. The chicken goes into the grill, directly over the fire. No heat deflectors, no indirect heat.
  4. I close the grill and ignore it for about four hours.
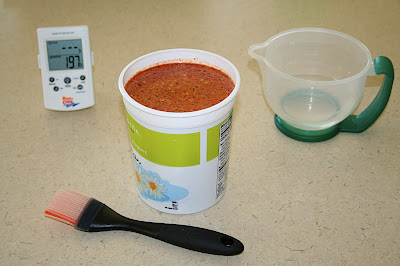
  5. I thin some sweet sauce. I've had good results using a combination of Kraft Original and Carolina Treet: almost any sauce should work, and a home-made sauce might be best.
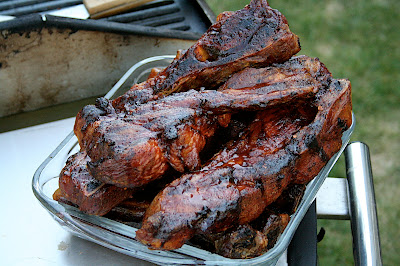
  6. I put the thinned sauce in a mixing bowl and immerse the cooked chicken in it, then return it to the grill so the sauce will caramelize.
  7. You can repeat that last step as many times as you like, but you're going for thin coats, not large globs of sugary sauce on that chicken.

We have church pot lucks twice a month, and I live a short walk away. So my new potluck dish is Baptist Chicken. I put it on the grill first thing in the morning, and ignore it until just before lunch. A quick coat and back on the grill, the chicken is ready to eat almost on time.

Sunday, July 12, 2015

Grillin'

It's been a little over a month since we bought the Big Joe. We've done quite a bit of cooking on it since then:

  1. smoked salmon
  2. barbecue pork
  3. pizza
  4. bread
  5. Baptist Chicken
  6. steak
  7. burgers
to name a few. One thing we haven't cooked is ribs... we should rectify that soon.

The Big Joe is a great grill: easily the best I've owned. It's not been perfect, but the folks at Kamado Joe have been quick to respond when I reached out to them. They really stand behind their product. I would definitely recommend one to anyone who wants to buy a ceramic grill.

The Big Joe is the only grill I've ever worked with that could properly smoke fish. The difficulty with smoking fish is to keep the temperature low enough that the fish doesn't overcook while keeping the fish exposed to the smoke long enough to cure it.

I had some salmon a neighbor caught that lay forgotten in my freezer for a few years. That fish was pretty much inedible after a couple years in the freezer; only smoking it seemed like a feasible rescue strategy.  After curing the salmon with salt and brown sugar overnight, we put it on the grill between 175° and 180°F for about nine hours over a fire of mesquite and alder.


Even a ceramic grill has trouble below 180°F: the fire did go out once, but we managed to keep it going more-or-less steadily from about 3:00 PM until midnight.


The finished product was really, really good. It was chewy and smoky, like salmon jerky. I'm not a huge fish-eater, but I definitely love some smoked salmon!


It's ironic that smoking salmon is primarily a method of preserving it. But once you smoke it, it becomes really, really difficult not to eat it up entirely within a few hours. I did manage to squirrel some away in the freezer, but most of it was eaten within a week.

Wednesday, June 10, 2015

Big new Grill

In December of 2006 I bought an exciting grill. It is a beautiful grill, but its innards are all cast iron, and cast iron does better in North Carolina than it does in Washington State. We brought that lovely grill out here in 2008, and it's been rusting ever since. It's gone from looking like this:
to looking more like this:
For the past few years, I've been wondering whether the solution to the Great Northwest Grill Dilemna is to buy a ceramic grill. When I was researching our current grill, I spent quite a bit of time studying on the Big Green Egg, although I found myself more drawn to some of the more esoteric kamado offerings (Komodo Kamado anyone?). I've been really fascinated by the whole kamado concept, and I think Ames was almost as curious as I.

So a couple weeks ago, when Ames and I realized it was time to get a replacement grill, there was a reasonably clear path forward.

Of course we did our research: we looked at the various kamado offerings, I pored over websites and blogs and product reviews. And in the end, we settled on the Kamado Joe. Of course I was going to just drop everything and head out to shop that night, but Ames did some research of her own, and found out when the Kamado Road Show would be coming to the local Costco.  In the end, we met the Kamado Joe guy at the Costco shortly after he opened shop, and he was already starting to run low on stock. It took me all of a minute to decide that what I really needed was the Big Joe, and next thing I knew, I was pushing one through the Costco.

But you don't care about my story. What you want to know is how the Joe works, whether it's pretty, and whether I've joined a cult.

We set up the Joe Friday night, with the help of a good friend who was willing to come wrestle a 250 lb grill out of the truck at a moment's notice.

The next morning I decided to put it through its paces.

To start, I took the thermometer out of the Joe and put it in boiling water. Yep, it read 210°F. That wasn't good enough for me: I spent several minutes adjusting it (and burning my fingers) before getting it back to 210°F. This time I was smart enough to leave it alone.

Next it was time to put some charcoal in it and see what it would do. The Joe has a grate in the bottom of the "firebox" that appears to be cast iron:
I took a charcoal chimney full of briquettes, put about a third of them into the grill, and lit the other two thirds. Once they got more or less lit, I dumped them into the grill, shut the lid, threw open the top and bottom vents, and started the stop watch.

The thermometer I had so carefully calibrated in boiling water was reading 500°F in ten minutes. Then I closed both the bottom and top vents and gave it a while. The fire went out, the charcoal got cold, and I had about half the charcoal left, ready for the next burn. You heard that right, this is a charcoal grill you can turn off! How awesome is that?

The first real cook was pizza; it was not successful. I made three errors:

  1. the dough was too wet
  2. I put in the pizza stone too early 
  3. I used briquettes.


The next night we tried again,  and it turned out well.  This time I lit the grill and let it get up around 500°F before putting in the pizza stone, then I let it continue to heat until it hit 700°F.

Although I didn't get a photo, the temperature was actually at 800° when I put in the first pizza.

The thicker pizza dough did the trick: the pies were sliding right off the peel and onto the stone.

Pizza cooks pretty quickly at 700° to 800°F. I didn't actually time them, but they were definitely cooking in less than ten minutes.


I used the Weber pizza stone my wife bought me many years ago: Apparently there is a Kamado Joe Pizza stone for this grill, but I haven't actually got one. The Weber is working well enough for now.


One problem I've had in the past with grilling pizza has been getting the top and bottom of the pies to done at the same time.  It's really easy to get a raw top and a burnt bottom. The ceramic grill works wonders: the pizza is done evenly top and bottom.


The thicker dough definitely rose into a nice crust. It was a little thicker than I like, but it was definitely a nice looking slice of pie!


It's true that pizza isn't the main reason I bought a new grill, but I've been excited to see how it works. I have to say, it was everything I hoped it could be.


Sunday, March 21, 2010

Ribs!

My mother-in-law is here for a visit. I'm one of her fans, so it's all cool. She brought me a couple bottles of barbecue sauce from North Carolina--which is, in fact, the Mecca of barbecue.
From Ribs


I had found some St. Louis-cut ribs at a restaurant supply store in Tacoma. I'd never found those before, although I've looked for them. So naturally I bought some and threw them into the freezer. My mother-in-law's visit seems a worthy occasion for breaking out those ribs.

Ribs are a serious topic. To get the real low-down, you ought to read Smoky's primer on ribs. But the short version is this: what you generally see in the store is "baby back ribs", which are actually from the pork loin. Those ribs are tender, and you can cook them almost any way you want, because they're an extremely tender cut of meat. But the price of tender, of course, is flavour. Just like with beef, the more tender cut is also the less flavourful cut. If you want flavour, you'll get the side ribs. They're higher in fat, harder to cook, and full of connective tissues.

But you can taste them.

St. Louis cut ribs are the middle of the rack of side ribs: side ribs with each end trimmed off. So they look like a rack of "baby backs", but they've got longer, flatter bones and a lot more fat. So they're like the best of both worlds.

Of course any time you have a tough hunk of meat with a lot of connective tissues and fat, you can deal with it in a couple ways. My preferred technique is to barbecue them. That means, you'll recall, cooking them in woodsmoke at around 200F for long periods of time.

From Ribs


The hardest part is temperature control. I manage that with a good thermometer, careful control of the fire, and adjusting airflow. One invaluable tool has been my 2X4 block to prop open the grill. Propping open the lid really helps keep it cool without choking the fire right down.
From Ribs


We started them slow in the morning, covered them in mustard and some spices, and threw them on the grill. We kept an eye on them all morning, basting them with our home-made basting sauce. Around noon, we broke open one of the bottles of Carolina Treet my mother-in-law brought me. It added a little colour to those bones.
From Ribs


And since it was lunch time, we made some pizza
From Ribs


We kept stoking and basting through the afternoon, until them bones were cooked and it was time to bake something sweet onto them. So we mixed up some off-the-shelf barbecue sauces, some of our own baste, and some of the Carolina Treet to make something red and sweet. That went on those racks, and we left them in the [cooling] grill for another 30 minutes or so.

Then it was time for ribs.
From Ribs


I love ribs! We made up some potato salad from the Red Hot 'n' Blue copycat recipe, Ames threw together some killer beans, and we feasted.

Ah ribs... my mother-in-law should visit more often!

From Ribs

Sunday, March 7, 2010

Redneck Pizza Oven

I've been playing with pizza for several months now. Of course, to really make pizza, you need a brick oven. I've been trying to figure out how to do that for a few months. Then one day, my boss sends me this link, of a guy who turned a Weber 22" grill into a pizza oven.

"Hey," I thought, "I can do something even easier on my grill! If a Weber can make pizza, a real grill can too!"

So I decided to make a redneck pizza oven.

We're on our third pizza stone since July. I bought one by Oneida, and it worked fine until it cracked (about 4 weeks after I bought it). Oneida kindly replaced it (with no questions asked, I might add), but the replacement cracked 6 weeks later. I finally bought the good one: the Williams Sonoma version. So far no cracks.

But since we have two broken pizza stones, I decided to reassemble them, jigsaw-puzzle-style for my pizza oven floor.
From Redneck Pizza Oven


The oven itself is made by placing four landscape bricks on my grill. They prop the lid open and shield the walls to keep heat in.
From Redneck Pizza Oven


So with the landscape bricks in place and the two Oneida stones shoved back together, we have the start of a pizza oven.
From Redneck Pizza Oven


I've found my pizza peel is sticky. I thought that was just my own incompetence until I used a friend's. The thing is, I have a $5 pizza peel, and it's varnished. So I took sandpaper to it. The improvement is indescribable. This afternoon I tried putting some cornmeal on the peel under the pies, and it worked like a charm. Not one pie got folded! I might have used too much cornmeal on the first pie.
From Redneck Pizza Oven

From Redneck Pizza Oven

From Redneck Pizza Oven


We realized with the first pie, the lid is too high. We ended up taking too long to get the top of the pie cooked appropriately. I didn't get any pictures of it, but we solved the problem by putting a reflector atop the bricks. So you can't see it, but there is a secret lid about 6" over the pizza stones under the grill lid.

The first reflector was cardboard. It burst into flames after two pies. Ames suggested we try the vanity cover I took off the front of the grill a couple years back (she is, after all, the brains of the operation). Whaddya know? It fits perfectly, it's steel, and it doesn't sag. The pies got a lot better after that one.

We made half a dozen or so pies. They all had a nice char on them, and a hint of smoke
From Redneck Pizza Oven


I soon realized I needed more heat, so I started shoveling burning charcoal right onto the cooking grates next to the pizza stones. It made the pies a little more ashy, and the effect was fabulous
From Redneck Pizza Oven

From Redneck Pizza Oven

Of course, one of the pizza stone pieces cracked again where one of the coals was touching it.

So the Redneck Pizza Oven worked like a champ.

But of course there are some improvements to be made. We need to find a better cooking surface. Reassembling the pizza stone jigsaw puzzle is going to get old pretty quick, and they're just too small. I'm open for suggestions: I've looked for unglazed tile and quarry stone, but I can't find either around here. I've thought of using a cast iron griddle too. Either way, I have a 19.5" deep grill. I want a cooking surface big enough to make at least 18" pies, if not full 19 inchers.

I'm not convinced our reflector is as good as it could be. I'd like to see if I can get something a little more draping. But Ames' version is a lot better than the cardboard ghetto-lid I had made.

And of course we need more practice.

But all in all, the experiment was a success.

From Redneck Pizza Oven

Monday, December 22, 2008

Smoky Snowy

So it's been snowy here for a little over a week: there have been threats of melting, and in Tacoma it has already completely melted once, but here in Puyallup it's not really gone away. We've had several days of fresh powder, lots of accumulation.

The first snow was unexpected, so my grill was left uncovered in the snow. It's been snowing so much since, my grill's just been getting hammered.

I decided to light a fire in it to dry it out, and it started snowing no more than 5 minutes after I started...

From Grilling in the snow


From Grilling in the snow


In my zeal to dry out the grill, I put upwards of ten pounds of charcoal in there: probably closer to 15 (3/4 of a 20 lb. bag). It got hot. My eldest got some pictures of the grill when I opened it and combustion started for real:
From Grilling in the snow

From Grilling in the snow


The grill-mounted thermometer maxes out just around 500F (around 5 o'clock). It reads about 70F cooler than it is. I went a good sixth of a turn past that (about 7 o'clock), so it must have been in the 700F--800F range.

Ribeyes were on sale, so I cooked some steaks. They were seared on both sides in well under 5 minutes, and the bones were protruding an inch. I took them off, let them cool, and then put them back on uncovered out in the falling snow to finish them off.

They were really good, but a little overdone.

Of course I burned the seasoning off my cast-iron grates, and need to reseason them: I put some grease on there once the grill cooled a bit last night. That won't be enough, but it should stave off some rust for at least a couple weeks and get me through the holidays.

That was fun.

Monday, August 18, 2008

Smokin'

So this weekend was the first BBQ in the new place. Oh, we've been grilling, but this weekend we did a slow-cook on the grill for somewhere between 5 and 7 hours.

I love slow cooking, so I've been keeping an eye out for cheap cuts of appropriate meat. I stumbled on some reasonable prices at Fred Meyer, so I brought home two packets of meat:

Beef ribs:


and country-style pork ribs:


Barbecue can dry out the meat, so I always start by covering them in cheap yellow mustard, garlic powder, salt, pepper, and paprika. I first heard of that from a friend who made incredible ribs. I've altered the style a bit from his technique: he used brown sugar, for example, while I avoid putting anything sweet on meat I'm barbecuing until it's done.


It might be interesting to note that I can't stand mustard. Or ketchup. I have a serious food aversion to ketchup: the thought of eating it nauseates me. I only use mustard to prep meat before cooking.


The real key to BBQ is to keep the temperature steady. You want to keep it somewhere between 200F and 220F for several hours. That's difficult to do over charcoal, but 90% of good barbecue is temperature.

I have a remote wireless thermometer, which makes monitoring it a lot easier. But however you monitor your temperature, that's the most crucial part to barbecuing.


My efforts to maintain a constant temperature sometimes get comical. My grill was too hot closed, and too cool open: so I improvised with a piece of wood. This technique worked fairly well:


Once the meat has been cooking a bit, it needs basting. Low cooking temperatures do a lot to prevent drying the meat, but even at 200F, the meat will get dry unless it's basted to replenish moisture. I use a mop sauce loosely based on Smoky Hale's "Eastern North Carolina Basting Sauce" on p. 245 of The Great American Barbecue and Grilling Manual. My version of this sauce is a little different than Smoky's, but I think mine gives a more rounded flavour. And mine reminds me a lot of the sauces I've actually eaten in eastern NC. Here's my mop sauce:
2 C. water
1 1/2 C. white vinegar
1/2 C. apple cider vinegar
1 T. crushed red pepper
1 1/2 T. salt
2 t. black pepper
1 T. garlic powder
2 T. paprika
Just mix all that up and you've got a basting sauce.


Part-way through the cook I had to stoke the fire, so I used the hibachi as a burn pit. It worked very well.


Then, after several hours of basting, the meat was cooked. I covered it in something sweet and sticky (cheap Kraft BBQ sauce cut with my baste to make it spread better), and left them to caramelize a little:


After a couple coats caramelized, I took them inside:


The verdict? Not too bad. The beef ribs were a little bony: slim pickings. But the flavour was all there, and the pork was definitely decent.

Next project: Boston butts. Time to bring some BBQ to the West Coast!

Monday, August 11, 2008

House Warming

So we had our first cook-out in the new digs. Our place is still stacked with boxes, we still have very little open floor space; but we had the privilege of some guests this last weekend.


But let's get the backstory first.

When we left the house in January, I had to part with my grill, as we couldn't "cook with open flame" in the apartment. Some wonderful friends agreed to grill-sit in exchange for use of it for six months; and my grill spent several months at a friend's house. We went over and cooked for them on it twice, but I have to admit I've missed my grill.

When we were in BC last month, I bought a small hibachi to use at the beach or the lake, and it was worth every penny of the $21.95 it cost me at Canadian Tire:


It looks a little rusty: that's new after being caught in a rainstorm (we have those in the Northwest). The problem with grilling on charcoal: ash is very caustic once it gets wet. Ash + Water = Lye.

At any rate, I got my grill unpacked, reassembled, and polished on Thursday or Friday. So it was a tearful reuniuon

Notice the shelf under the grill is still dirty. I need to get that cleaned. But the stainless is pretty shiny.

So Saturday KingJaymz and his Queen came to visit. They bore gifts, including a bottle of Old Viscosity Ale and a Stumptown Tart. Neither bottle made it through the night. (No, it wasn't a drunken rout, we had a nice long visit and got thirsty a couple times.)


But the main event, of course, was meat. Saturday as Bone-In Ribeye Day.


Good food, good drink, good company. Saturday was a good day.


Update: I can't help notice KingJaymz' account of the visit is so much more meaningful and kinder than mine. I discuss the grill, beer, and meat; while he talks about how nice we are. I'm tempted to edit my post heavily, but I think that would blur the reality of the situation: he's obviously a better man than I.