Showing posts with label recipes. Show all posts

Monday, February 18, 2013

I've been cutting back a lot of good things out of my diet: mainly meat, eggs, and dairy. That's put a kink into my cooking, to say the least.

But I figure Valentine's Day is a special occasion, so I returned (much like a canine to his regurgitation) to my bad habits and made some sticky buns for my wife.

From Valentine's Day Cinnamon Buns

I've been playing with cinnamon buns for the last year or so, and have found they offer a high return on investment. They're not nearly so difficult to make as they look, and almost everyone loves them.

There's some room for variety with cinnamon rolls: I generally make way too much caramel and turn them into a sort of a caramel bun. But recently I've been making a simple butter frosting and serving them that way instead.

From Valentine's Day Cinnamon Buns
Probably my favourite variation is to put raisins in them, although Ames isn't such a huge fan. One interesting twist I tried was chopping a couple apples finely and rolling bits of chopped apple into the cinnamon spiral. That worked out rather well.

I use the simple cinnamon bun recipe I found in A Century of Canadian Home Cooking. The buns are chewy and soft, but they don't age well and feel stale within a couple days. Not like that's generally a problem.

We got up early, made some coffee, and ate fresh hot cinnamon buns. That was a great way to start the day.

From Valentine's Day Cinnamon Buns

Saturday, June 9, 2012

Chili

I love chili. A hot dog with a slice of cheese, a few jalapenos, and a slathering of chili might just be the perfect food. A bowl of chili and a handful of corn chips is one of the greatest Epicurean pleasures. But frankly, I'm willing to eat chili all on its own.

I took some chili to a church potluck last Sunday and some people asked for my recipe. Of course I haven't a recipe, but I've been having a hankering for chili anyway, so I just went ahead and made another batch today, taking notes.

I based my chili on a great recipe for Chile Colorado I found online. In fact, you probably want to make that Chile Colorado. It's fabulous.

Let's start with ingredients.

From Chili
Today I used about a pound and a half of ground beef (probably 80/20, I'm not too sure), a dozen New Mexico chiles, two onions, four cloves of garlic, three cans of beans, fresh jalapeno, salt, black pepper, crushed red pepper, and cumin. That's pretty close to the basic chili. I don't always use jalapeno, but I do like some sort of green in there for colour. Last week I used some very mild pepper that looked a lot like a poblano. Use what you like.

We start with the chiles. You can use basically any dried chiles you can get your hands on, but they don't all taste the same. My favourite is New Mexico chiles, but California chiles work well too. I've been known to throw ancho and arbol chiles in too, but I always use either New Mexico or California chiles for a base. In my experience, the New Mexico chiles have a richer flavour than the Californias, but they're noticeably hotter. If spicy food is your thing, the New Mexico are a great choice, but if you're more a "mild" person you might prefer the Californias.

I found this page helpful in listing different chiles and comparing them.

You'll want to wash and cut the chiles. A purist would seed them, but I usually don't bother. If you want to seed them, do it like this: cut off the stem, slit the chile in half, and scrape out the seeds and so on from inside the chile. Like this:

From Chili
If you remove the seeds, you'll find the chiles lose significant heat. But since my family are all into spicy food, I find it easier just to break off the stem and break the chile into about three pieces:
From Chili

When you've got all the chiles broken up and rinsed, put them in a pan with about three cups of water. I never measure the water, it's not that important. Then cover them, put them on the stove on high, and let them reach a boil.

From Chili
When you get a boil, take the chiles off the stove and let them sit for at least 30 minutes in the water. This will allow them to steep, and they'll rehydrate.

When you're waiting on the chiles, you might as well get everything else going. I used to brown the onions, then the beef, then add beans. But I realized I could cut down on grease if I did the beef first. That way, rather than draining the beef fat, I could just use it to fry onions and garlic in. It works out if you think about it.

So we'll put the beef in a heavy pot and get it going. I like to add some salt at this point, but I generally don't add anything else until after the meat is browned.

From Chili
Now when you're browning ground beef, the more you work it while it's still raw, the finer the browned beef will be. I like the meat to be really fine and distributed through the chili, so I work it a lot when it's raw. If you like chunks of meat in your chili, leave it alone and you'll get those chunks.
From Chili

Once the beef is thoroughly browned, take it out of the pan, leaving as much grease behind as you can. We'll use that to brown the onions. If you got lean beef, you might need to add butter, oil, or bacon fat here. They'll all work.

You'll want to get your onions, garlic cloves, and jalapenos chopped at this point. I normally use a mandoline, but today I just chopped with a knife. So I put onions, salt, some red pepper, and some black pepper into the beef fat and got them sizzling. Once the onions are translucent, you'll add garlic and jalapenos.

From Chili

When that all looks cooked enough, it's time to add the beef back in.

From Chili
I put a healthy does of cumin in there too: say a couple teaspoons. I don't know, I didn't measure.

When that all sizzles and you're worried about scorching, it's time to add in beans. Today I used a can of "Chili Beans" and two cans of black beans, but I rarely use the same combination twice. I really like it when I get at least three kinds of beans in there, but today I only had two.

I just dump the beans right on top of the meat and stir them in.

From Chili
I'll frequently rinse the bean cans with water and dump that in too.
From Chili

Now we'll let that cook while we head back to the chiles. Remember those? They're still steeping in the water, so we'll want to turn them into a paste. We'll need a blender here: I use a stick blender most of the time, but today I used the Bosch.

We'll take the chiles out of their bath and put them into the blender. They should be pretty well rehydrated at this point, looking a little bloated and cooked.

From Chili
We'll take them out of the water, not straining too carefully, and get them into the blender.
From Chili
Once the chiles are in there, they'll need some of their bath-water in there too. Not too much, just enough so you can blend them into a paste. I find you need about half the volume of the chiles in water, but it's best to go slow, adding more as you need it.
From Chili
Now you want to blend them into a smooth paste. This can take some time, but you'll want to do it right.
From Chili

Now we just add that paste back into the meat and bean mixture on the stove and stir it in.

From Chili
At first it'll be pretty brown, but after a few minutes it'll develop a nice deep red.
From Chili

Essentially you're cooking's done at this point, but it'll taste pretty rough for at least a couple hours. Let it simmer for at least two or three hours, then taste it again. It should start to taste pretty good.

I have to make a note of this: this recipe needs a lot of salt. The meat and chiles both seem to suck it right up. I probably have at least a tablespoon or two of salt in a batch, and I find myself adding salt through the day. Don't be shy with the salt: it'll make a world of difference.

So that's it: that's my chili. There's no tomato in it, and I find that makes it work really well in a Crock Pot, if you want to go that route. I find Crock Pots do murder to anything with tomato in it, but this chili works great in the slow-cooker.

Tonight we're having chili dogs, and I'm getting impatient!

Sunday, April 15, 2012

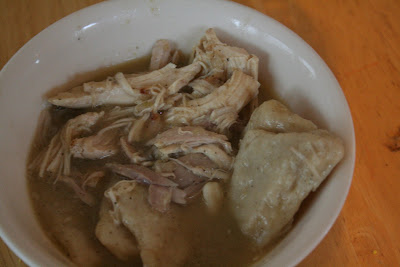
Chicken and Dumplings

Everything I cook is comfort food. Among my favourites is chicken-and-dumplings. Really, this is the ultimate comfort food. A couple people have asked me for the recipe, and I told them I'd write down what I do next time I make it: it's not like I'm working from a real recipe here. Well... next time was yesterday; so I'm writing it down.

From Chicken and Dumplings

In rural North Carolina, people make "chicken and pastry," rather than "chicken and dumplings." What they refer to as "pastry" is a homemade sort of pasta made from flour, salt, and pepper. Ames makes it with her mother's recipe, but I've made it a couple times using the "Granny's Chicken and Pastry" recipe from Carolina Country. I've made some really good chicken and pastry with that recipe, but I've never been able to follow it exactly. The pastry dough in that recipe always comes out way too stiff.

But I admit I prefer softer dumplings to true Southern "slippery noodles," and so I've mucked about looking for a good way to make those. I've referred to Alton Brown's recipe from Feasting on Asphalt: The River Run, but I've never tried actually following it. My "recipe" is as follows:

Today I used a whole chicken, I generally just use chicken thighs:

  • 1 chicken
  • 2 medium onions, chopped
  • 1 quart water
  • 1--2 quarts chicken broth
First saute the onions in a large pot. I like to cook them in bacon grease, but butter would work as well. Chop them fine, put them on to cook with plenty of salt and pepper (I never measure, I just use enough). When the onions are all transluscent, set them aside and put the chicken in the pot. I've done the chicken in the oven and on the stovetop: I'm not really sure which is better. Today I put a whole chicken in the pot, brushed it with olive oil, salt, and pepper, and roasted it at 385F for an hour.

From Chicken and Dumplings

Once the chicken looked about done, I pulled it out of the oven and put it on the stovetop. I added the onions back to the chicken, put about a quart of water on it, and got it to a rolling boil for about 45 minutes. When the chicken was easily pulled apart with a fork, I removed it from the heat.

From Chicken and Dumplings

Now's the tricky part: we need to pull the chicken from the bones, and we need to make dumplings. So I generally take the chicken out of the pot and set it aside to cool. In the meantime, I get the dumplings going.

Dumplings:

  • 2 Cups flour
  • 3/4 tsp salt
  • 1 tsp pepper
  • 1/2 tsp baking powder
  • 1 tbsp shortening
  • rice milk
That's actually pretty close to Alton's recipe.

From Chicken and Dumplings

I mix the dry ingredients in the mixer and hit them with the whip attachment to get them blended. Then I cut the shortening into the mixture. Finally, I pour a small amount of rice milk (chicken broth, milk, or water would work just as well) into it until I get a sticky dough. This gets rolled out and cut into 1" X 1" squares.

From Chicken and Dumplings

There's never enough broth left from a chicken, so I always end up topping it up. I add about another two quarts of water and then add chicken base to make up a broth. If you have chicken stock lying around, that'll work even better. So now we've got dumpling dough cut into squares and about three quarts of broth: it's time to get them dumplings cooked.

From Chicken and Dumplings

The trick to cooking the dumplings is to get them into boiling broth as quickly as possible, without losing the boil. So I get the broth to a very strong rolling boil and start throwing dumplings in. I find I can easily throw in a handful at a time without having any trouble; but if the boil slows to a simmer, let it get going again before putting in any more. If you're making southern-style pastry, it only takes 15 minutes to get them cooked; but fatter dumplings take longer, say 30 or 40 minutes.

From Chicken and Dumplings

While the dumplings cook, get all the chicken off the bones. I probably throw away too little, but this time Ames picked the bones for me and the meat looked great. When the dumplings look done, add the meat back in.

From Chicken and Dumplings

So that's it. It's not really that hard, but it takes most of a day: there's a lot of "hurry up and wait" with chicken and dumplings. But it's the most comforting comfort food I know, and it's well worth the day's investment to make it right.

From Chicken and Dumplings

Postscript: I got the idea of roasting the chicken in the oven from an episode of "Diners, Drive-ins, and Dives" where they visit Dish, a restaurant in Charlotte about a mile from where I used to work. I generally do the chicken entirely on the stovetop, but when I saw this video, I decided to try the oven. There's an excerpt from it on YouTube: http://youtu.be/BEM2MQoaFH4

Saturday, May 28, 2011

Weekend cooking

We're planning on a "cookout" for Memorial Day (Monday). Most of my team at work is going to come over and we'll throw down with some food from the grill.

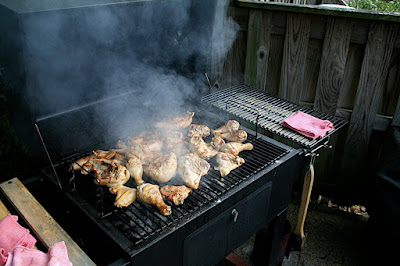
So today I'm cooking one of Ames' favourites: Baptist Chicken. We take some chicken pieces (I've never tried with whole chickens) and barbecue them (~200F for several hours). Once the chicken is completely cooked we immerse it in some sweet and sticky sauce and put it back on the grill to caramelize a bit. Get it? Baptist: full immersion after it's completely cooked. We started making this when we still lived in North Carolina:
From Baptist Chicken


So I put some chicken on the grill this morning: it smells heavenly out there right now.
From Baptist Chicken


Plenty of things taste better than chicken, but nothing smells better. There's just an indefinable goodness to the smell of chicken fat burning on charcoal.


On another front, I took some time off for my birthday (I had too much vacation time accrued and needed to burn some). Since I had the time off, my kids and I made some beer. I came up with a recipe with the help of Beer Calculus, and we put it together.

From Woolen Shirt
From Woolen Shirt

I'm calling this one "Old Woolen Shirt". It seems an appropriate name for a beer of that colour. I followed some advice I found online and have tasted one bottle a week since bottling. We bottled it two weeks ago today, so that's two beers.

The first bottle was not quite flat, but pretty close (at one week). The flavour was really good: caramel-y and toasty with a nice roast barley undertone, but not too sweet.
From Woolen Shirt


One week later and it was a lot more carbonated (at two weeks).
The flavour was still there, but it's a little drier. It's developed a definite yeast bite, but that should fade over time. I'm not really expecting it to be ready to drink until it's conditioned at least another week and then chilled for several more days, so I'm not too worried about the yeasty flavour.
From Woolen Shirt


The colour's dead-on, but it's a little cloudy. It should clear some more with time, but I don't think this one's ever going to drop really clear.
From Woolen Shirt


I'm really happy with this beer. I realize it's still pretty young, but it's very promising. I'll definitely be making this one again soon. I managed to get a huge crop of yeast from washing the trub when I bottled this one. That always helps with the $$$.


I've got one more batch fermenting right now: this one's an amber beer with wheat. I tried to make it lower alcohol, and I'm experimenting with Irish moss and longer fermentation to see how clear I can get it. I'm making this one with yeast I harvested from the Woolen Shirt, so that's a bonus. I haven't named the current batch yet.

Tuesday, December 7, 2010

In every pot

I've been cooking a lot of chook recently. I'm afraid the family's getting a little tired of chicken stew, but it's just not getting old for me.

From Chicken stew


Looks like we've finally figured out how to make a good chicken stew. I have to confess that I made mediocre chicken stews for years, coasting on the fact that it's hard to really ruin chicken...

So here's how we do it:

First I take down my favourite stew pot: my 5-Quart cast iron Dutch oven by Lodge Logic. I chop up a large onion (or two medium onions, or...) and a few of those "baby carrots" and a couple sticks of celery. I put a healthy thwack of butter into the pan and get it hot. Onions, carrots, and celery go into the butter along with a couple garlic cloves. They get covered in a generous dose of salt and way too much black pepper, then I cook them until the onions are translucent. Once done, I empty the pot into a bowl.

From Chicken stew


Next I brown the chicken. I generally take some leftover bacon grease and add it to the pot, which is already hot. I put in more than enough to cover the bottom: there was a good 1/8 inch of grease in there this last time. I put three or four chicken thighs (skin on) into the grease, put salt and a generous layer of pepper on them, and let them brown. Now here's the thing: when I say "brown", I mean "mahogany". I essentially fry those thighs in that bacon grease for twenty or more minutes. When one side gets brown, I turn them over and do the other side. If I want to use more chicken I brown it in batches of three or four so they all get plenty of one-on-one time with the cast iron and bacon grease.

From Chicken stew


Once the chicken is brown, I put the onions, carrots, and celery back in the pot, cover it, and cook at medium for a good 45 minutes or so.

As the chicken is stewing in the onions, I cut some red potatoes, wash them, and pan-fry them. So I put some bacon grease on the griddle and lay out the potato chunks in it to fry. When one side is brown, I roll them to brown the other. I want the potatoes to have a healthy golden-brown crust.

Once the potatoes are done it's time to pull the skin off the chicken. Chicken skin is high in fat, so you really don't want to eat it.

Then the potatoes go into the pot along with frozen green beans, I cover it, and cook at until it's all done. I like to cook this at a medium on the stove-top, or 250--300F in the oven.

From Chicken stew


Be aware this is not low-fat cooking. It's highly likely you'll have a massive coronary while eating my cooking. But my goodness it's good.

Tuesday, December 22, 2009

Lasagna

I have a sort of sehnsucht for good lasagna. On Vancouver Island, pretty much any restaurant that advertises lasagna serves a wonderful concoction of pasta, rich brown meat sauce, and toasted cheese in a small casserole dish. What people cook and serve in their homes is more like the traditional lasagna you might find anywhere: a tomatoey, tangy sauce between somewhat dry layers of cheese and pasta.

When I left the Island, I realized that those lasagnas of my youth were in fact somewhat rare. I launched on a long quest to find lasagna, and ended up eating many cubes of layered tomato and pasta. I ordered lasagna in good Italian places, and got a very tangy, creamy, cheesey pile of noodles. The best lasagna I had of that sort was at Fontanella in Charlotte, NC.

But I was longing for the lasagnas of those elder days. The greatest of those is the lasagna of Romeo's Place in Nanaimo, Duncan, and Victoria.

But the key to my search was when I discovered Julianna Pizza and House of Pizza in Charlotte, NC. It was at Juliana that I first recognized a very important correlation, "Say, everywhere I find that makes the kind of lasagna I like is owned by Greeks..." And so I added a criterion to my list of lasagnas: only order lasagna where there is at least one picture of the Parthenon on the walls. I have yet to find a Greek-owned restaurant without at least a picture of the Parthenon on one wall and an ikon of the Theotokos on another.

When we moved back west, I took the opportunity of being back on the Island to revisit my lasagna haunts. Memory hadn't exaggerated the goodness: the lasagnas and baked ravioli were every bit as good as I had remembered.

So a couple months ago, I went out on a limb and googled "Greek meat sauce recipe". I was curious what I'd find. What do you know, I found some recipes for kima. It looked interesting, and got me to thinking...

For a couple months now, I've wondered if I'd been the victim of marketing. Although all the lasagnas I'd truly enjoyed were listed as "Italian Fare" in the menus of those Greek restaurants, what if they were actually Greek fare?

So yesterday, I googled "Greek meat sauce recipe" again, and picked what looked like a winner: http://www.grouprecipes.com/3403/greek-meat-sauce.html. It looked possible, so I decided to try it.

And while I was at it, I spent some time doing some "research" online, and found some interesting articles about Greek pasta dishes (here's one: http://www.in2greece.com/english/food/greek-pasta-dishes.html). And lo and behold, they claimed that pasta with meat sauce is extremely popular in Greece: they're eaten baked and steamed... like the pasta menu items at my favourite lasagna joints.

By now I was pretty sure I had figured it out: places like Romeo's were serving Greek pasta dishes and calling them "Italian Fare."

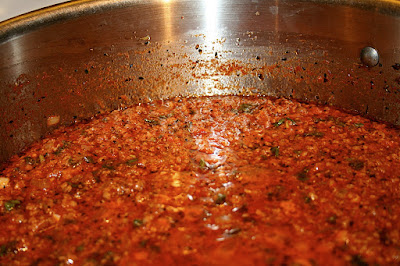
So last night I made the kima from that recipe. It ended up looking like this:
From Lasagna

That's promising. And the smell... it smells just like Romeo's...

Tonight we assembled it into some crocks we had bought to make onion soup (a story for another time). We used a mixture of cheddar and mozzarella, as we had asked one time what Romeo's uses to top their pastas:
From Lasagna


And we baked them long enough to put a little toast on that cheese:
From Lasagna


From Lasagna


The verdict? It's not Romeo's or San Marcos'. But it's very, very close. Like, we figured out how they make it and just need to tweak the recipe to taste.

This is a major breakthrough for me.

Wednesday, April 23, 2008

Mrs. Lovett

I've had an incredible hankering for meat pies. I know exactly where it comes from: I read The String of Pearls, the original Sweeney Todd story, this weekend, and the author's repeated description of the delicious meat pies made me hungrier with every telling.

So I decided to make some. Unlike Mrs. Lovett, I chose to use beef.

We started with a London broil we had picked up on sale somewhere: I cut it into cubes and cooked it in a pot with garlic, onion, salt, and some olive oil. Once it was all browned, I turned down the heat, covered it, and let it stew in its own juices for 30 minutes or so. Then I put the lid on the pan, put the pan in the fridge, and forgot about it for a couple days.

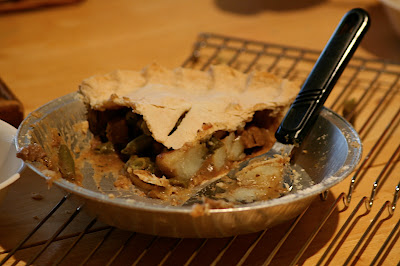
Two days later, after the beef had had some time to "season" a little, I brought it out, put it on the stove on low, and started to warm it up. My daughter peeled four mid-sized potatoes, and we boiled them with some salt in some water. Once the potatoes were soft, we poured the potato water off into the beef, took the meat out of the juice, and made a gravy from the meat juice and potato water (we added a little bouillon and some corn starch to thicken it). Once the gravy looked respectable, we put the potatoes and beef into it, turned off the stove, and stirred it all together to form a thick stew.


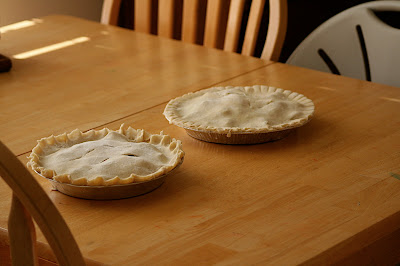
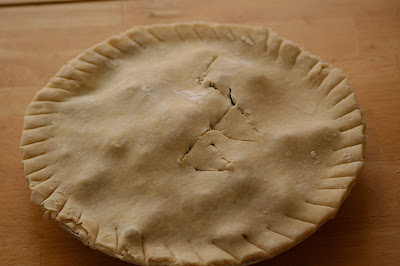
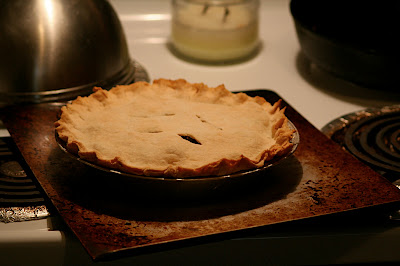
My daughter made pastry, we lined two pie plates, and put half the beef/potato/gravy mixture into each one. Despite my daughter's protestations, we put some frozen green beans in each pie, then put lids on them and baked them.


The pies baked for about an hour, then we took one out and cut it.


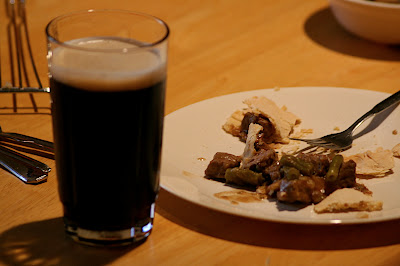
I knew a good pie needed a good beer to wash it down, so I cracked a bottle of Chambly Noire and tucked in.


The verdict? No doubt Mrs. Lovett's pies were excellent, but I think I prefer mine.