Now that we're living in the middle of nowhere, and heating with wood, our priorities have begun to shift a little. We're burning through wood faster than I expected; that's not the best news, but we have plenty of dead trees – seasoned firewood! The problem lies in getting them out of the back yard and into the wood pile.
Of course we don't want to burn unseasoned wood, but the wood that we know has been down for at least a year is eligible for immediate burning. Wood that's too old we can still burn in a firepit, but we don't want it in our stove. Wood that's still green is worth processing for next year, but it's a mistake to try and burn it too early.
We've processed wood with axe, bow saw, and chainsaw. The chainsaw is the fastest, the bow saw is the most exercise. I finally gave in and built a sawbuck to get the wood up off the ground so I can get a good angle with either saw.
I made the sawbuck from six eight-foot 2x6 boards. There's almost a complete board left over: I had planned to use half of it as a stringer, but there are already three stringers on it, and it's heavier than I wanted.
The construction is simple: the three uprights are made from two four-foot lengths joined with a carriage bolt. I drilled a 3/8" hole in the center of each board, 30" above the bottom. Then I ran a 3/8" carriage bolt through each pair. Each upright has the bottom inside corner cut off at 30° to make it more stable.
There are two pieces on each upright section cut with a 30° mitre at each end: they're 12" long on the bottom. Those are to fix the uprights at a permanent angle. They're fastened in with 3" long decking screws.
One is butted up to the front leg and screwed to the back, the other is butted up to the back and screwed to the front. They're screwed together in the middle. I thought of gluing them together, but I think the screws will hold just fine. The idea was to keep the legs at a fixed angle, and "fill in" the gaps to make it easier to assemble the sawbuck.
The stringers are just 48" 2x6 boards attached with decking screws to the legs. I cut four stringers, but only used three because of the weight.
I'm surprised how much better it is to cut on the sawbuck. And the 2x6 weight, while difficult to move around, makes the whole system stable, even when bucking logs with a chainsaw. Now I'm wondering why I waited so long to make it...
This last summer we moved from the city into the country. We're no longer able to see and hear everything our neighbors are doing, which I consider a pretty major improvement.
One of the complications with our new situation is that we're now living in a bit of a snow-belt, and our poor house isn't really designed to handle that sort of weather. So one of our first orders of business was getting a reliable source of heat.
Just to give you an idea: it's October 1, and we've already had our first snowfall this year. It all melted within a few hours, but it was a liberal dusting of snow. The hilltops around us stayed snowy for a couple days. It's looking like a cold winter.
Being out in the middle of nowhere, a wood stove was definitely an option. And the more time we spent researching and mulling it over, the more we realized that was probably the right choice.
So we bought a wood stove:
We spent more time than I expected on finding the "right" stove, but it was installed surprisingly quickly once we made the choice. The stove is a Hearthstone Heritage TruHybrid.
I didn't like the look of the stove at first: I thought it looked like someone had glued stones to a squirrel to make a turtle. But I admit it's grown on me. It's built out of blocks of soapstone on a cast iron frame. So it's very heavy, and it takes a long time to warm up.
The "TruHybrid" system is actually a "catalytic combustor" system. There's a catalytic reactor in the "ceiling" of the stove that burns the smoke from the fire in order to make the fire hotter, reduce the smoke, reduce the emissions from the stove, and clean the burn. This isn't just injecting air into the top of the stove for a secondary burn – this stove does that as well – it's actually a tertiary burn.
I grew up with wood stoves. My chores included splitting wood, cutting kindling, and bringing armloads of split wood into the house to fill "the wood box." But the wood stoves of today aren't the glorified cast iron boxes of my youth: they're a great deal more complicated, and it took us a while to figure out how to use the new stove.
So here are some things I wish someone had told me about the Hearthstone Heritage IV before I got one:
The soapstone really works. It does. It is frequently warm to the touch ten or twelve hours after the fire has gone out. This stove is almost more a wood-powered radiator than a wood stove.
We have the optional blower installed on the stove. The blower is heat-activated, so it won't come on unless the stove is hot to the touch right near the blower. The blower will turn off when the stove cools down. The blower is a little loud, but we just turn it down during the day and turn it back up at night.
The Hearthstone manual isn't terribly helpful when it comes to troubleshooting. It might even make things worse. The manual gives dire warnings about "over-burning" the stove, and how it voids all your warranties if you burn it too hot. The problem is... the stove won't start unless it's hot. More on that later.
The glass door is a nice touch, but it smokes terribly when you open it: the side door isn't a gimmick, it's the only way to get the fire going without smoking out your house.
The glass door gets messy, but the recommended cleaning technique in the manual actually works: wet a cloth, dip it in the ashes in the stove, and it'll wipe the creosote right off the glass.
The stone on the stove takes forever to warm up. It can be cool to the touch while there's a blazing fire inside. This means the stove will smoke like a cold stove for a very long time. This is one smoky stove if you're not careful.
The biggest challenge with this stove is getting it lit. The stove is designed not to operate at low temperature, because they want it to run clean via the catalytic combustor; and the catalyst doesn't work unless it's hot. But because the stove is stone, and it takes so long to heat up, it's a real challenge to get the fire actually to light. As long as the stove is cold, it won't draw air, and your fire will die in billows of smoke.
The solution is to start with a much bigger fire than you think you need. You need to get a hot fire going as quickly as possible, so that the stove will stop smoking and draw in fresh air. Of course you're worried about shocking the stone and cracking it. And you're worried about over-burning your stove and voiding the warranties. But if you don't get the biggest fire you can in the stove as early as possible, it won't ever light – you'll end up with a smoking, cold stove.
So we use a lot of paper, and a lot of kindling. That gets a good blaze going very quickly. We're not even trying to light the wood at this point: we're trying to get the stove hot as quickly as possible. After it blazes up, we keep a door cracked open to get more air to the flames for at least twenty or thirty minutes. Once the stove warms enough to draw, we close the doors.
Now, it's taking almost an hour for the stove to warm to the point that the catalytic combustor can work. But once we get it to that point, we throw the lever and it really takes off. Now that we've figured out the key is a large blaze as soon as possible to get the stove actually to light, our next goal is to get the catalytic combustor working in less than 45 minutes. We'll see how that turns out.
I'm quite happy with this wood stove, but I honestly thought we'd gotten a lemon for several weeks. We just couldn't figure out how to get it to light cleanly. Now that we've cracked that nut, the stove is a dream.
I wanted to come up with a practical way to carry shotshells while out on adventure. There are plenty of solutions online: I looked at side-saddles that attach directly to the shotgun, chest rigs made from ballistic nylon, bandoliers that sling over the shoulder, and even buttstock covers with loops to hold cartridges. But at the end of the day, almost all those solutions were way more tactical than I wanted. When I head out, it's usually in a wool sweater and oiled leather boots.
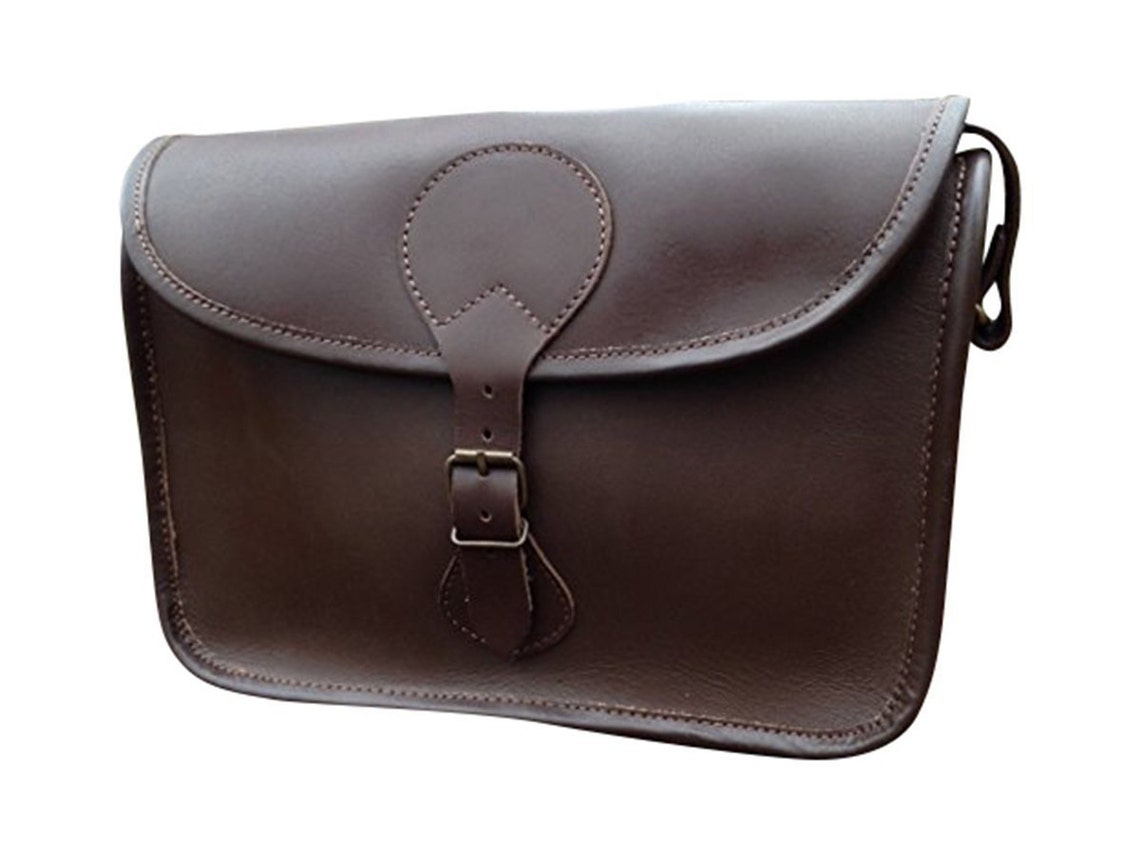
The best all-around option seemed to be the leather cartridge bag. It will work equally well for plinking in the woods, shooting in the gravel pit, or hunting during pheasant season. Loaded with 100 one-ounce shells, it'll weigh in around six pounds.
My biggest concern with ordering this cartridge bag was the fact that it shipped from the UK. I was quite pleased with the entire process. The bag was listed for $51.36 (USD). The final cost (including taxes and shipping) was $63.80 (USD). That's not very expensive for a leather bag.
I ordered the bag on January 2, it shipped on January 3, and I received it January 14. So it was less than two weeks from placing the order to receiving it, and four days before the estimated delivery date.
The cartridge bag looks just like the pictures. The leather is a little thinner than I expected, and the buckles are a little smaller. But the bag is quite sturdy, and I have no doubt it'll last me for many years.
The only thing about the bag I don't like is the leather "drawstring" in the mouth of the bag. It's leather, but it's quite flimsy. I expect I'll end up pulling out that leather thong.
The listing says the bag holds over 100 cartridges. I emptied two boxes of shotshells (50 cartridges) into the bag, which filled the bag about half-way. So it seems like 100 cartridges is about right. I noticed the bag held more when I turned all the shotshells to lie in the same direction: when I just dumped the two boxes' worth of shells into the bag, they filled it more than half full.
The leather feels a little too stiff, but I think after some use and some leather treatment, it'll be great.
All in all, the bag is well worth the price. It was delivered on time, and I'm quite excited to take it out on an adventure.